Sage and Cream Interiors · THE GUIDE
Arrange a Tiered Ladder Shelf for Indoor Propagation and Seeds
Cultivating houseplant cuttings and nurturing young seedlings indoors requires reliable light and accessible vertical staging. A freestanding tiered ladder shelf placed beside a patio door offers an efficient, vertical solution that maximizes natural illumination without cluttering functional floor space. By combining pale wood tones, cream finishes, and sage ceramic accents, your indoor propagation setup functions as an organized decorative display. Proper arrangement keeps fragile glass vials stable, balances weight across shelves, and leaves door thresholds completely clear for daily residential traffic.
Jump to the checklist ↓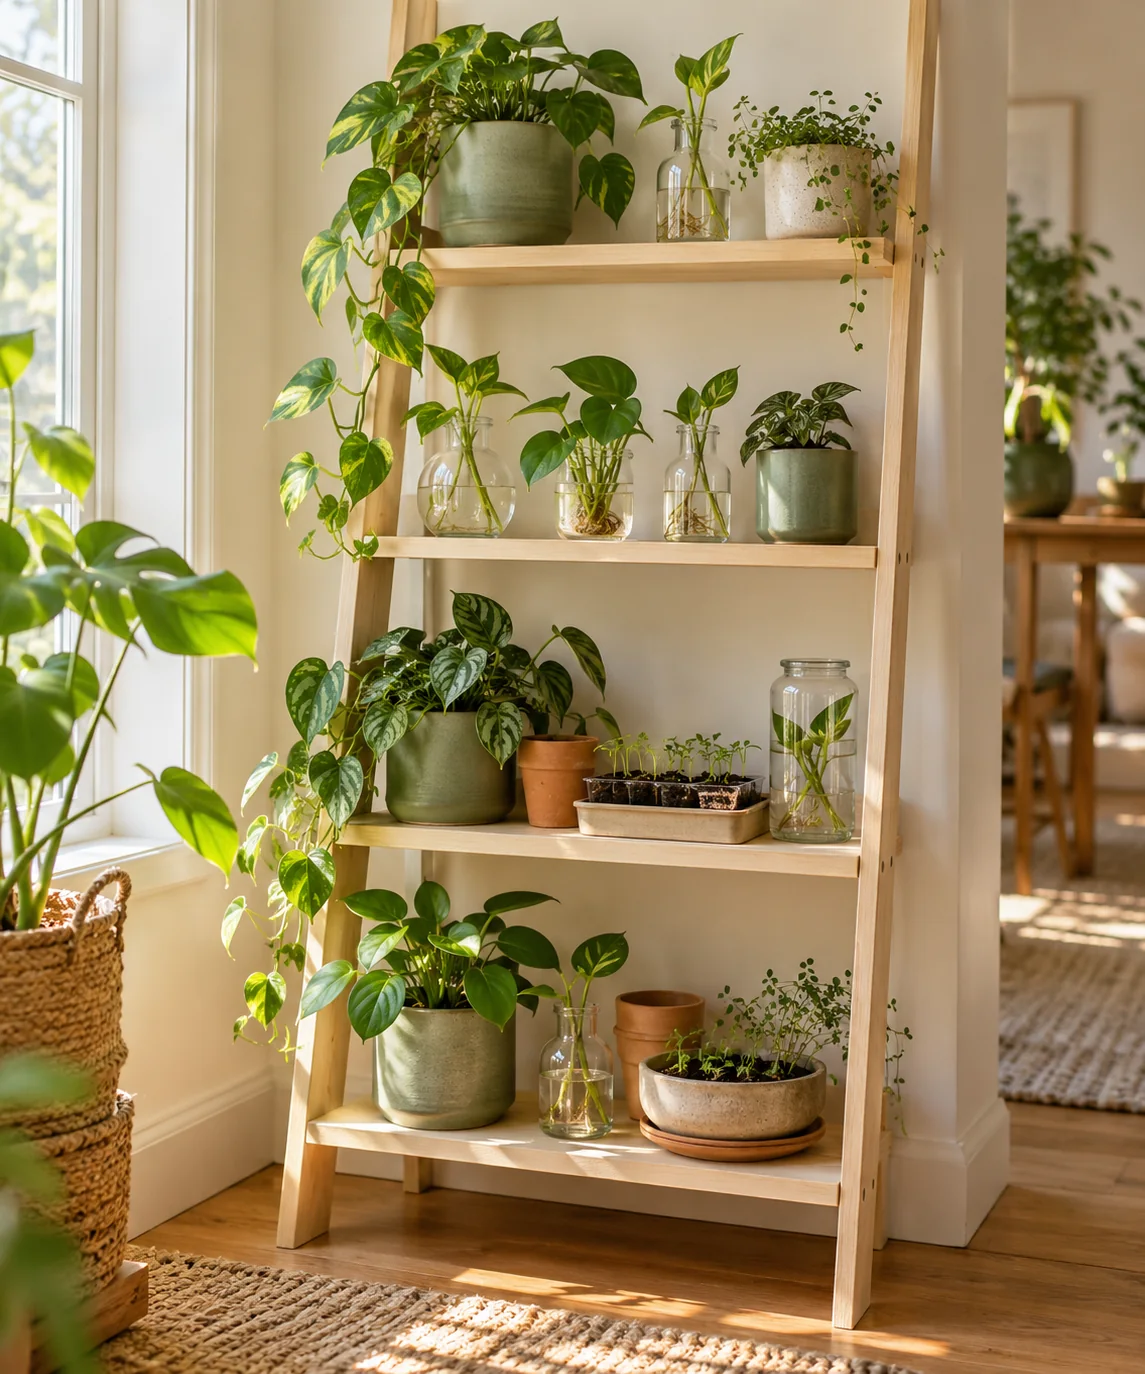
Assessing Light Levels Near Patio Doors
Positioning a ladder shelf near a patio door offers access to bright daylight, which supports root development in cuttings and early growth in seedlings. Place the unit along the stationary panel rather than the moving door track to keep entryways unobstructed. Monitor natural light exposure throughout the day, as intense, unshaded afternoon sun can overheat water in glass propagation vessels or dry out the delicate surface of seed-starting trays.
Managing Weight Distribution and Shelf Stability
Distributing container weight thoughtfully helps maintain ladder shelf balance. Stage heavier ceramic pots and broader trays on the deepest, lowest tier, keeping middle shelves for medium-sized containers. Reserve narrower upper tiers for lightweight glass vials and slender cuttings. Always follow manufacturer guidelines for total shelf capacity, and secure freestanding units to the wall using appropriate anti-tip hardware to prevent accidental tipping, especially in high-traffic zones.
Surface Protection and Moisture Management
Wood finishes can suffer water damage from routine plant care. Place glass vials, jars, and seedling pots on glazed saucers, enamel trays, or waterproof coasters to catch drips and condensation. When topping off water vessels or misting young sprouts, move containers away from the shelf to a sink or waterproof tray, and promptly wipe up stray moisture to protect timber coatings from warping or staining.
Arranging Propagation Vials and Seedling Trays
Organizing plant vessels by care requirements makes weekly monitoring easier. Group clear water vials together so root emergence can be checked without unnecessary handling. Position seedling containers where they receive even, direct illumination from above to encourage balanced growth. Spacing vessels to allow modest airflow between foliage helps reduce stagnant moisture around tender stems while keeping the display visually tidy.
Routine Maintenance and Container Cleaning
Water in propagation containers should be refreshed periodically to keep vessels clear and prevent stagnant conditions around developing roots. Rinse glass vials when film or algae accumulates on interior surfaces, and wipe down shelf tiers with a dry cloth to clear dust and stray potting mix. As rooted cuttings develop viable root systems, pot them into potting substrate and adjust shelf placements according to each plant’s light needs.
YOUR STARTING POINT
A little checklist.
Original editorial guidance. Images are AI-generated concepts, not photographs of completed projects. Our sources and approach.
Questions to consider
Can culinary herb seeds be started on this ladder shelf?
Herb seedlings can be started on the shelf if the patio door provides sufficient direct daily light. Seedlings placed in insufficient light often grow weak and leggy as they stretch toward the glass.
How often should water in propagation vials be refreshed?
Changing the water every several days helps keep the liquid fresh, limits cloudy residue, and makes it easier to observe new root formation on stem cuttings.
How can a tiered ladder shelf be kept safe from tipping?
Follow the manufacturer's assembly instructions and install anti-tip wall brackets or safety straps. In addition, keep the heaviest planters centered on the lowest tier.