Warm Neutral Living Rooms · THE GUIDE
Install Simple Pine Picture Rails for Rotating Children’s Art
Displaying children's artwork often introduces visual disarray when sheets of uneven paper are taped across painted walls or refrigerators. Slim natural pine picture rails provide an orderly, curated gallery format that integrates naturally into warm neutral interior designs. By resting paper creations along narrow timber ledges, you can refresh the display weekly without damaging wall surfaces with adhesives. This structured presentation celebrates personal family creativity while maintaining the tailored lines, muted color balance, and calming order essential to a restful living area.
Jump to the checklist ↓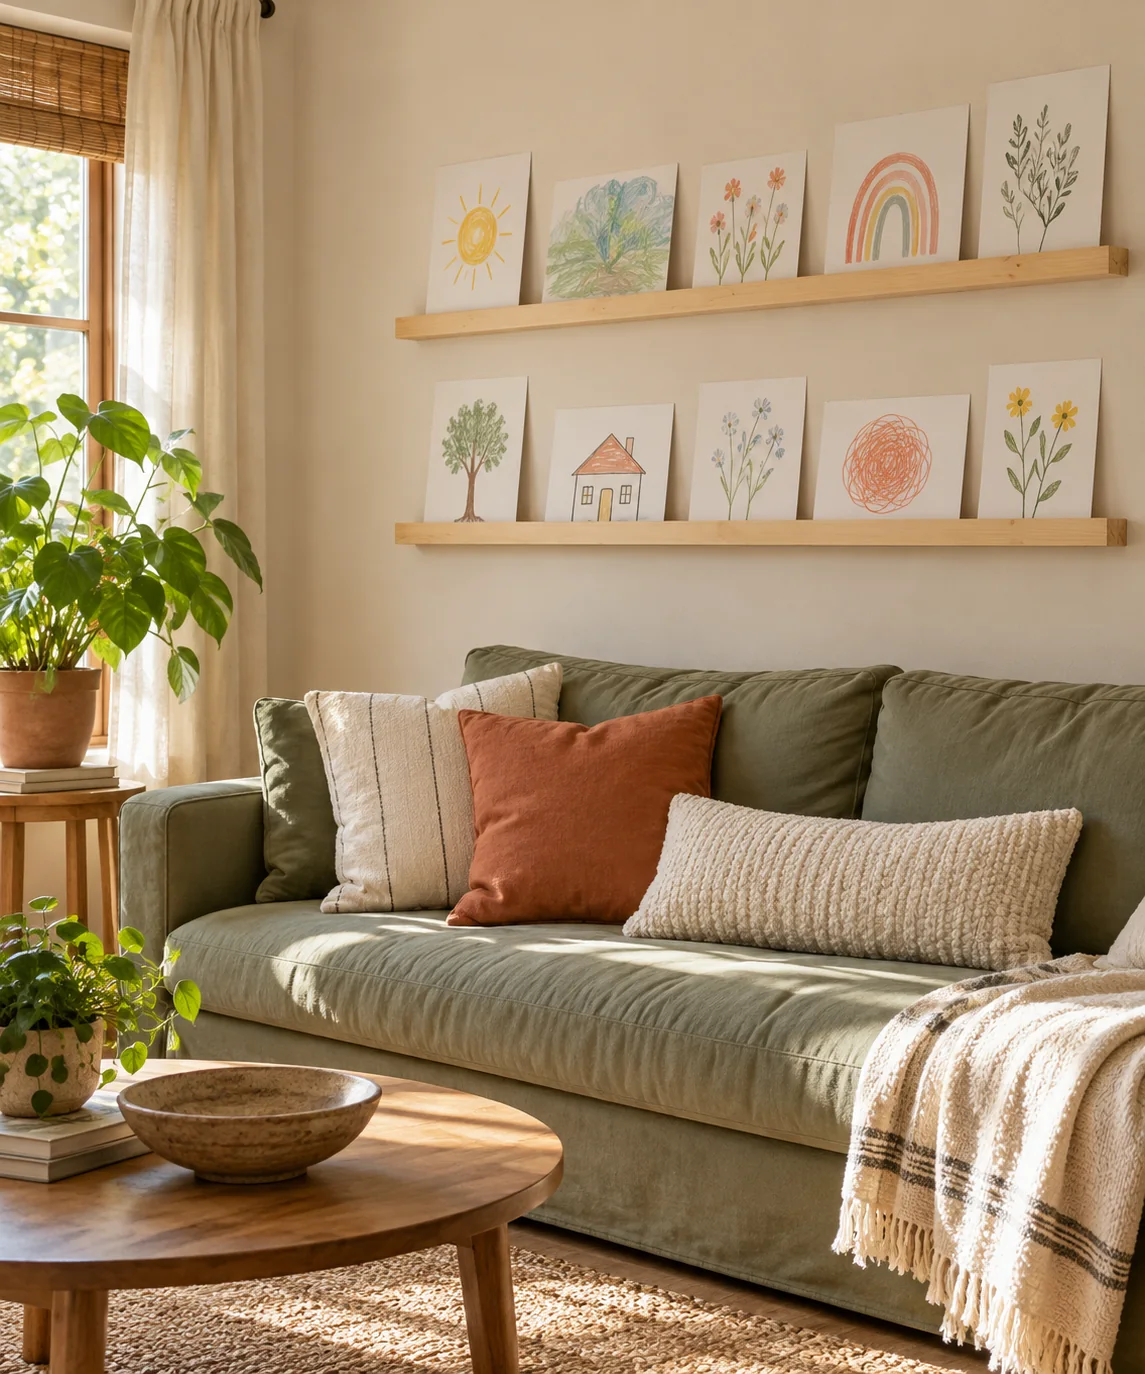
Determining Display Line Height
Hang picture ledges at an intentional midpoint between adult eye level and seated viewing height, typically centered fifty-four to sixty inches above the finished floor. If placing two rails vertically on a single wall, leave fourteen to sixteen inches between the ledges. This spacing accommodates standard paper sizes while keeping the entire display balanced against nearby furniture silhouettes, door frames, and standard room trim without overwhelming the perimeter.
Selecting Ledge Profile and Proportion
A picture ledge for paper displays needs only a shallow profile, ideally two to two-and-a-half inches deep with a half-inch front retaining lip. Bulky picture shelves project too far into living rooms and invite heavy decorative clutter. Untreated or matte-sealed pine retains pale honey and wheat hues that coordinate seamlessly with almond, chalk, or soft taupe walls, allowing the children’s paper art to remain the primary visual element.
Standardizing Mounts with Neutral Cardstock
To unify diverse drawings made with wax crayons, graphite, or watercolor, back each original drawing onto standardized heavyweight cream or warm white cardstock mats. Use small removable archival adhesive dots on the back corners to attach the artwork to the cardstock backing. Uniform neutral margins bring visual quietness to varied subjects, instantly transforming classroom sketches into a cohesive gallery collection.
Arranging and Layering Paper Works
Instead of lining papers up edge-to-edge, create a deliberate rhythm by gently overlapping the cardstock borders by an inch or two. Intersperse detailed drawings with simpler minimalist line sketches or monochrome cutouts to balance visual weight across the shelf length. Limit the rail capacity to three or four pieces per three-foot section to avoid visual clutter and maintain an intentional, spacious presentation.
Establishing an Easy Art Rotation System
Keep a slim portfolio folder or lidded storage box in a nearby cabinet to streamline weekly or monthly art swaps. When new artwork arrives, slide older pieces into long-term archival storage and place the latest pieces on the pine rails. This predictable routine prevents emotional clutter from accumulating while honoring your child’s creative milestones in a polished, organized, and reversible living room setting.
YOUR STARTING POINT
A little checklist.
Original editorial guidance. Images are AI-generated concepts, not photographs of completed projects. Our sources and approach.
Questions to consider
How do I prevent lightweight papers from curling on the ledge?
Mount drawings onto stiff three-hundred-gram cardstock using acid-free adhesive squares. The weight of the heavier card keeps the sheet standing flat against the wall without curling over time.
Can I finish pine rails to match my existing trim?
A clear, matte water-based wax or light furniture oil protects the pine while preserving its natural pale tone. Avoid dark, glossy stains that distract from the neutral wall balance.
How many pieces of art should I display at once?
Aim for three to five carefully chosen pieces across a four-foot rail. Leaving breathing space around each mat prevents the display from looking chaotic in a neutral living room.